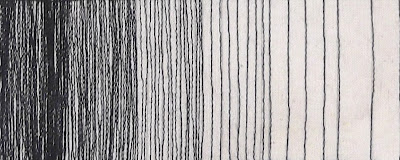
Enrich fabric surface by simply sewing straight or curved lines. See how you can play with tonal values and changes from dark to light, using the sewing machine and the simple straight stitch.
Materials: Polyester black thread on white cotton
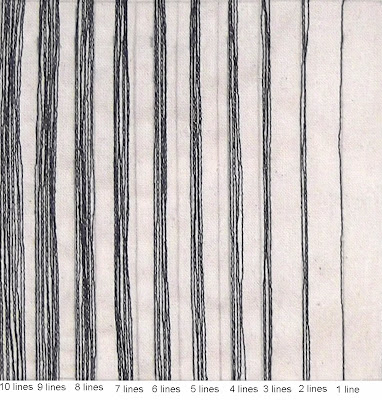
Materials: Polyester black thread on white cotton
- Technique 01: Change the distance between the rows. Start by drawing, with a pencil and a ruller, 10 lines with an in-between distance of 1/16'' (or 1mm). Then draw 10 more lines with an in-between distance of 1/8'' (or 2mm). As you move from one side to the other increase gradually the distance between the lines.
- Technique 02: Decrease gradually the width of the black row. Draw with a pencil and a ruler some lines with an in-between distance of 1/2'' (or 1cm) and stitch them with the sewing machine. Next to the first stitch, stitch 9 more dense lines parallel to each other. Next to the second stitch, stitched 8 more lines, and so on.
- Technique 03: Divide the textile surface into equal strips and fill each strip with a specific number of lines. Fill the first strip with a large number of stitched lines (for example 60 stitched lines). This will be the darkest strip. Fill the second strip with fewer stitched lines (for example with 50 stitched lines). As you move to the lighter strip decrease the number of stitched lines. The stitched lines can be straight, angled
or curved.
 |
| I've divided the fabric into 5 strips. I filled the darkest strip with 50 random, curved lines, the next strip with 40 curved lines and so on. |
 |
| I've divided the fabric into 6 strips. I filled each strip with a specific number of vertical lines. |
- Apart from the straight stitch you can also experiment with several fill stitches, like zig zag.
 |
| Tonal values with zig zag stitches |
- To create the darkest area adjust the length of the sewing machine, to number 2. To create the lighter area and make more transparent stitches adjust the length to 4.
- See more ideas of machine stitching surface decoration.
 |
| Creating strips / Making parallel machine stitched lines. |
 |
| Random machine straight stitched lines. |
 |
| Black and white patchwork. The white fabric was enriched with machine seams. |
 | |
|
 | ||
|


It’s an interesting approach. I commonly see unexceptional views on the subject but yours it’s written in a pretty unusual fashion. Surely, I will revisit your website for additional information. sewing machine
ReplyDeletegreat experiment with Black and white tones! You are simply outstanding.
ReplyDeleteSerena from Machine Embroidery Digitizing