Two-layer geometric molas are the oldest type of mola art. The technique is similar to reverse applique stitching. Lets start with an easy pattern, the meander or labyrinth, a popular pattern in Kuna culture. Two color molas are made with two layers of fabric basted together. The top layer is cut and stitched a little at a time, revealing gradually channels of the foundation layer. The width of the channel is normally about 1/4 inch.

Step 1: Print this simple design
One of the most popular mola patterns was the symbol of meanders. Print the following design on a piece of paper.

Step 2: Pick two fabric.
Find two pieces of cotton or semi-cotton fabric and cut them in square shape (the size of each piece to be about 5''X5''). It is preferable the fabrics to have solid and contrasting colors. Some interesting color combinations are the following:
- Blue and Orange
- Green and red
- Yellow and violet
- Black and white
 |
| Cut two square pieces of fabric (about 5''x5'') |
Step 3: Transfer the design onto the fabric
Most of the mola designs are complex to draw and it is impressive how Kuna women could draw the design directly on the fabric surface, either by using a pencil or with the thread. Of course, today you can easily transfer the design using a carbon paper. Center the pattern and the transfer paper over the green fabric, pin it and trace it.
 |
| Copy the design to the fabric using carbon paper |
Step 4: Lay the one piece over the other
Take the two pieces of fabric and lay them one on top of the other. The grain of each piece should match the grain of the other or lie at right angles to it. Also, consider the effect of a light color on top of a dark one. The dark color may show through the light color.
 |
| Lay the fabrics one on top of the other |
Step 5: Baste the layers together
Pin or baste the fabrics together with their edges aligned.
 |
| Baste the layers together |
Step 6: Tack with stitches over the design lines.
It is much easier to work, if you tack with stitches the design lines.
 |
| Tack with stitches over the design lines (in the photo is the yellow thread) |
Step 7: Cut through the top layer with scissors
With scissors cut through the top layer of the two pieces of fabric. Use a sharp, pointed scissors. Cut right in the middle, between the design lines (the green dashed line in the following picture). Be careful not to cut in the wrong side of the traced lines. It is easy to get confused on these designs.
 |
| Cut through the top layer with a sharp, pointed scissors |
Step 8: Cut a few inches of the top layer.


Step 9: Snip tacking thread
Snip a small part of tacking thread and remove this part of thread. If you use carbon paper, you'll see the traced lines.

Step 10: Turn the fabric under itself
Fold one side of the cutting edge and turn it under the top layer.

Step 11: Stitch using hem-stitch
Start stitching the top layer to the foundation layer. Use whip stitch (or hem-stitch) and work from right to left. Use thread which matches the color of the top layer. While stitching do not pull the thread to tightly so that the fabric do not puckers.


Step 12: Continue cutting the top layer with scissors
Continue, cutting with scissors through the top layer. Cut right in the middle, between the design lines.


Note: Mola technique is about cutting and stitching a channel of reverse applique. This means that the top layer is cut, each side of the cut is folded under and stitched- first one side and then the other- resulting in a narrow opening revealing the underneath fabric.
 |
| The drawing indicate which lines of the pattern are to be cut and which ones are to be folded under. |
Step 13: Fold the top layer and stitch
Fold one side of the cutting edge and turn it under the top layer. Start stitching the top layer to the foundation layer working from right to left.


Step 14: Continue cutting, folding and stitching revealing gradually the design.


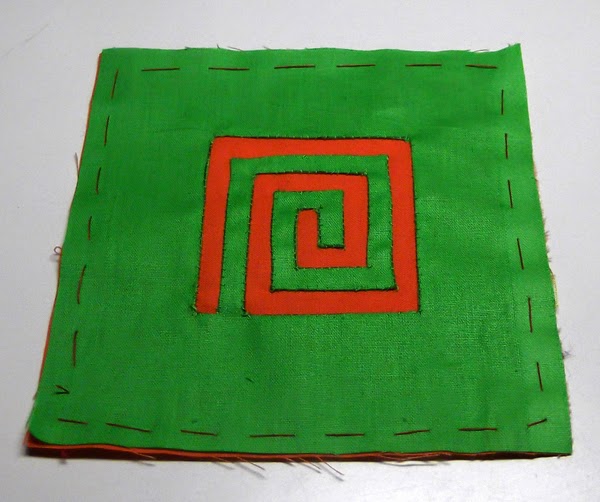
Step 15: You have reached the end of the channel (the center of the maiandros). Continue turning under and stitching the seam allowance. From now on, you don't need to cut the green fabric with scissors.


Your first mola piece is ready.


These are really great instructions and photos! Thank you!
ReplyDeleteThese instructions are very easy to follow. Thank you so much for putting them together!
ReplyDeleteVery helpful. Thank you.
ReplyDeleteOh my God! Thank you so much! I make paper and digital art inspired by molas and I've never seen how the fabric ones were really made. I had a vague idea and knew about reverse aplique but had never actually seen done step by step.
ReplyDelete