Follow the step by step instructions to draw one of the most common, yet daunting patterns in Islamic Geometry. A continuous interlacing geometic piece.

Step 1: Draw a straight line and a circle.

Step 2: Draw two large circles, of the same radius as shown in the image below.

Step 3: Draw a line, which is perpendiculal to the first line.

Step 4. Erase the two large circles

Step 5. Draw 2 circles as shown in the image below/

Step 6. Draw two more circles, as shown in the image.

Step 7. Draw the lines, joining several interesection points. This splits the circle into 12 sections.

Step 8. Draw the rotated square.

Step 9. Draw a second square (30 degrees rotated)

Step 10. Draw a third square (30 degrees rotated)

Step 11. Draw the lines as shown in the images below.

Step 12. Draw the small circle as shown in the image below.


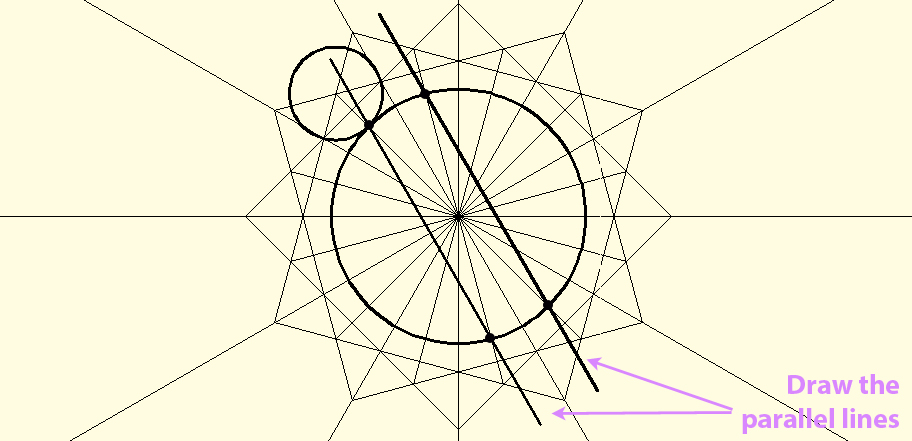
Step 15. Draw a pair of parallel lines.
Step 16. Draw one more pair of parallel lines.

Step 16. Draw one more pair of parallel lines.

Step 17. Draw one more pair of parallel lines.

Step 20. Draw one more pair of parallel lines.

Step 21. Draw the last pair of parallel lines.

Step 22. Highlight with a colored pencil the following segmments.

Step 23. Continue highlighting several segments.

Step 24. Continue highlighting several segments.

Step 25. Continue highlighting several segments.

Step 26. Finish highlighting all the necessary segments.

Step 27. Erase the background lines to isolate the basic shape

Step 28. Give width to the shape

Step 29. Erase the middle line

Step 30. Trim some segments to make the interlacing motif.


No comments:
Post a Comment