Dan-Tsunagi: It is an easy, square based pattern, suitable for beginners with right angled corners.

Materials:
1. Cut a rectangle out of the blue fabric (12x16'' or 31x40,6cm) and a rectangle out of the backing fabric.
2. Draw directly onto the cloth, using a quilter's ruler and tailor's chalk, some parallel, horizontal lines at equal intervals. The distance between the lines is 1' (2.5cm). Allow some free space, around 2'' (5cm) from the perimeter.


3. Dan-Tsunagi pattern is made by using blocks of squares (a grid of squares). So, apart from the horizontal lines, you'll need to make some vertical, parallel lines at equal intervals (1'' or 5cm)

4. Lay the facing and the backing fabrics one above the other.

6. Fasten them together by tacking. After completing sashiko embroidery you'll remove the tacking stitches.

Try to make many stitches at a time and keep them as even as possible. It is better to fold the fabric into the the needle with your left hand (if you are right handed) than the opposite.


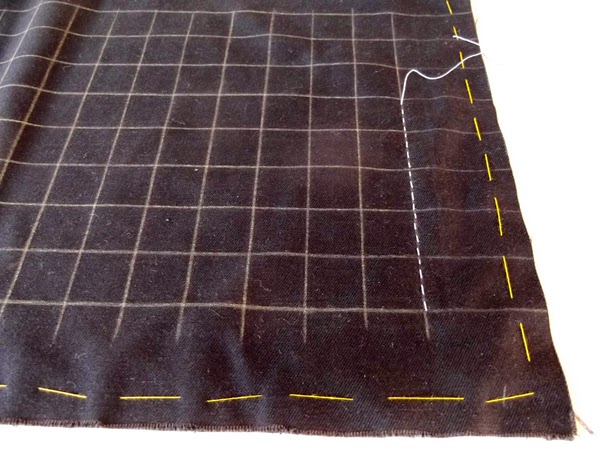
8. Complete the rectangular frame.

9. Start one of the zig-zag lines and complete it. It is better to sew one zigzag line at a time. This means, that you must finish it and then start another line with a new thread.


10. Stitch the next zig zag line.

11. Complete all the zigzag lines.
12. You can even make the pattern denser and add more zigzag lines by subdivinding further the grid.

Materials:
- Facing fabric: The most common fabric is indigo cotton cloth. However, you can used any black or dark blue cotton fabric.
- Backing fabric: A slightly thinner fabric
- A white cotton thread, for example DMC (no 30 blanc)
- Sashiko needles or any long embroidery needles (at least 2'' long)
- Scissors
- Ruler. You can use a quilter's ruler, which has a grid of lines printed on its surface and helps you draw parallel lines more easy.
- Tailor's chalk of french chalk or a any light coloured pencil
1. Cut a rectangle out of the blue fabric (12x16'' or 31x40,6cm) and a rectangle out of the backing fabric.
 |
| Cut a rectangle out of the facing fabric |
 |
| Cut a rectangle out of the backing fabric |
3. Dan-Tsunagi pattern is made by using blocks of squares (a grid of squares). So, apart from the horizontal lines, you'll need to make some vertical, parallel lines at equal intervals (1'' or 5cm)
4. Lay the facing and the backing fabrics one above the other.
6. Fasten them together by tacking. After completing sashiko embroidery you'll remove the tacking stitches.
7. Start stitching along the frame lines with small running stitches. The size of the stitches depends on the thickness of the fabric, the threads and of course the design. For example, if you have a fine cloth you should use small stitches while for a thick cloth use big stitches. The most important is, that the stitches on the front are slightly longer than those on the back (ratio 3:2).
Traditionally, sashiko does not allow to start and end a stitch with a knot. But for the ease of the project and since the reverse of the fabric will not be seen, you can use knots.
Fit the same number of stitches in inch. The corners must be accurate right angles. To make them sharp, the needle nust either go into the point of the corner or come out from it.
10. Stitch the next zig zag line.
11. Complete all the zigzag lines.
12. You can even make the pattern denser and add more zigzag lines by subdivinding further the grid.


very interesting and well presented. this makes an elegant finish to the plain fabric
ReplyDelete