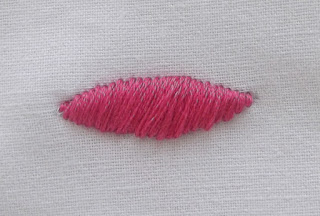
Slanted satin stitch is almost identical to satin stitch. The main differences are two: Firstly, the slanted stitch is not vertical or horizontal to the basic lines of the shape. Secondly, the stitching should start from the center of the shape and not from the bottom left corner (as in the case of straight satin stitch).
1. With a pencil draw a vertical line, in the middle of the shape you want to fill.
2. Decide how oblique the satin stitch will be. For a less oblique slant, start your thread closer to the middle of the shape. For a more dramatic slant start closer to the left corner. Bring the needle up through point (1).
2. Bring the needle back through point (2) at the opposite point. That is, if you started the stitch 5mm to the left of the center, finish it 5mm to the right of the center.
3. Bring the needle up through point (3) at the bottom of the square, just to the right of the previous stitch and as close as possible.
4. Pass the needle back through point (4) to the right of the previous stitch. The thread must be parallel to the first stitch, with no fabric showing in between.
5. Keep stitching until the area to the right of your initial stitch is totally covered.
6. Start with a new thread or continue with the existing thread (Pass the thread under the stitches at the back side of the fabric). Bring the needle up through point (a), just to the left of the first stitch and as close as possible.
7. Pass the needle back through point (b). Be careful the stitch to be parallel to the center stitch with no fabric showing in between.
8. Keep stitching until the area of the shape to the left of the initial stitch is completely covered.


No comments:
Post a Comment